How to Build a Custom Slide-Out Cart Drawer in Shopify Liquid (With Free Shipping Bar)
Learn how to build a custom Shopify cart drawer in Liquid with Ajax cart updates, quantity controls, product recommendations, and a dynamic free shipping progress bar.
How to Build a Custom Slide-Out Cart Drawer in Shopify Liquid (With Free Shipping Bar)
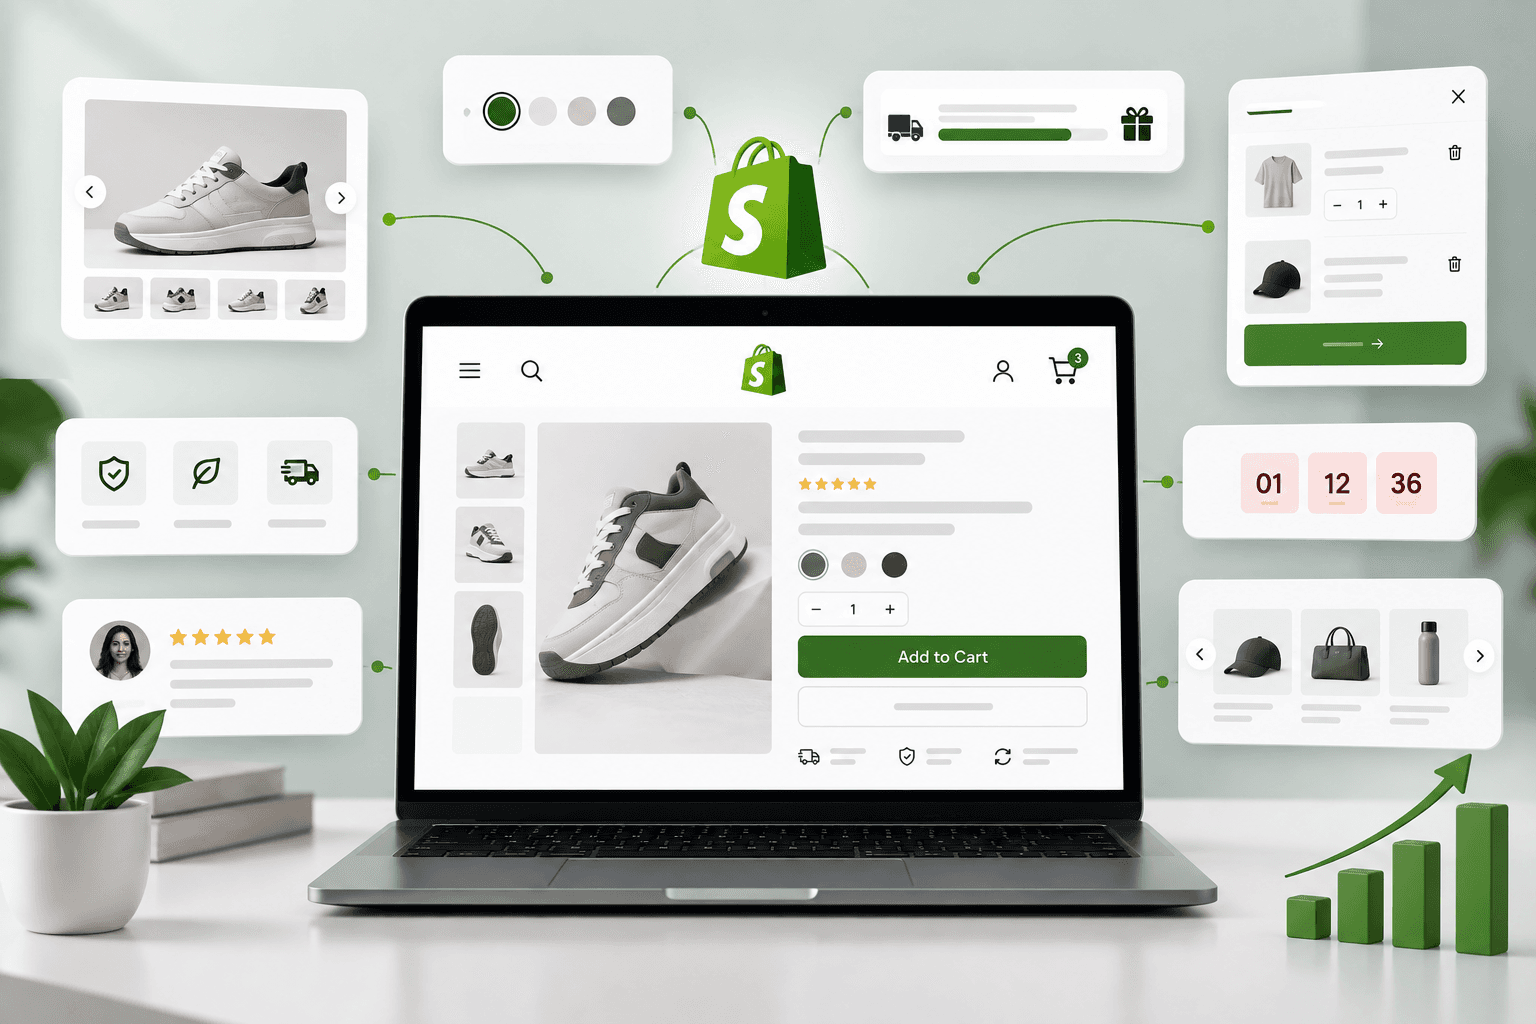
A well-designed cart experience can have a major impact on Shopify conversion rates. Instead of sending shoppers to a separate cart page every time they add a product, a custom Shopify cart drawer can immediately show the updated cart, subtotal, shipping progress, discounts, and checkout CTA without forcing the customer to leave the product page.
In this guide, we’ll build acustom slide- out cart drawer in Shopify Liquid using Shopify’s theme architecture, Liquid, JavaScript, and the Shopify Ajax Cart API.We’ll also add a dynamic
free shipping progress bar
that tells customers exactly how much more they need to spend to unlock free shipping.
The goal is not just to create a visually attractive cart drawer. The goal is to build one that is fast, maintainable, responsive, conversion-focused, and compatible with modern Shopify themes.
If you are building or improving a Shopify storefront, you may also want to read our guide on Shopify theme architecture to understand how sections, snippets, templates, and assets work together.
What Is a Shopify Cart Drawer?
A Shopify cart drawer is a panel that slides into view when a shopper adds a product to their cart. Instead of navigating to /cart, the customer stays on the current page while the cart contents are displayed inside an overlay or side panel.
A typical custom cart drawer can contain:
Cart items and product images
Product titles and variant information
Quantity increase and decrease controls
Remove item functionality
Line-item pricing
Cart subtotal
Discount information
Free shipping progress bar
Checkout button
Continue shopping button
Product recommendations
Optional cart notes or upsells
Unlike a simple HTML popup, a proper Shopify cart drawer needs to stay synchronized with Shopify's actual cart state. That is why the implementation should use Shopify's Ajax Cart API rather than manually changing prices or quantities in the browser.
Why Use a Custom Cart Drawer Instead of the Default Cart Page?
The standard Shopify cart page is useful, but it introduces another navigation step between product discovery and checkout. A slide-out cart can create a much more fluid shopping experience.
Feature
Standard Cart Page
Custom Cart Drawer
Page navigation
Required
Usually not required
Quick quantity updates
Possible
Yes
Free shipping progress
Possible
Highly visible
Upselling
Possible
Easy to integrate
Shopping continuity
Lower
Higher
For DTC brands, the cart drawer can become an important part of the conversion rate optimization strategy. It can show shoppers what they have added, encourage them to reach a free-shipping threshold, and provide a clear path to checkout.
How Shopify Cart Drawer Architecture Works
A good implementation separates responsibilities between Liquid, HTML, CSS, and JavaScript.
Shopify Liquid: Renders the cart data and drawer markup.
CSS: Controls the drawer animation, overlay, responsive layout, and visual design.
Ajax Cart API: Communicates with Shopify's cart endpoints.
Section Rendering API: Can return server-rendered theme sections after cart changes.
This separation is important because the browser should not become responsible for recreating Shopify's cart logic. Shopify remains the source of truth for cart quantities, prices, discounts, and totals.
Shopify's Ajax API provides theme-friendly endpoints for cart operations, while the Section Rendering API can return updated section HTML without a complete page reload.
Step 1: Create the Cart Drawer Section
For a modern Shopify Online Store 2.0 theme, a cart drawer can be implemented as a dedicated section such as:
sections/cart-drawer.liquid
Keeping the drawer in its own section makes the code easier to maintain and gives you a clean target for Shopify's Section Rendering API.
Shopify sections are reusable Liquid modules and can contain blocks, settings, and merchant-customizable content. They can also be rendered dynamically through the Section Rendering API.
Step 2: Build the Drawer Markup With Liquid
Start with a drawer wrapper, overlay, header, cart content area, and footer.
Separating the main drawer shell from the cart contents using a snippet can make future maintenance easier. For example:
snippets/cart-drawer-content.liquid
This approach becomes particularly useful when the contents need to be replaced after an Ajax request.
Step 3: Loop Through Shopify Cart Items
Shopify exposes the current cart through the Liquid cart object. It contains properties such as the cart items, item count, subtotal, total price, discounts, and other cart information.
Depending on the store's checkout configuration and theme architecture, you may choose to use the cart page or a direct checkout action. The important part is that the CTA remains obvious and accessible.
Step 5: Build the Free Shipping Progress Bar
One of the most useful features you can add to a cart drawer is a free shipping progress bar.
For example, suppose the brand offers free shipping when the cart reaches $100.
If the customer has $65 in the cart, the drawer can display:
You’re $35 away from free shipping.
Once the cart reaches the threshold:
🎉 You unlocked free shipping!
This is more than a visual feature. It can create a clear reason for customers to add another product to the cart.
Calculate the Free Shipping Progress
Assume the free shipping threshold is 10000 in the store's currency subunits. Shopify's money-related cart values are represented in the currency's subunit, so the threshold should be handled consistently with the cart value.
Important: the threshold must match the actual business rule configured by the merchant. Do not hard-code a free shipping message if the store's shipping policy varies by country, customer location, market, product type, or shipping profile.
Make the Free Shipping Threshold Editable
For a production Shopify theme, it is better to let the merchant control the threshold through the theme editor instead of editing Liquid code every time.
Then use the section setting to calculate the progress bar.
This is one of the major advantages of Shopify Online Store 2.0 theme architecture: merchants can configure sections and settings through the theme editor instead of relying on developers for every small content or merchandising change.
Step 7: Add JavaScript to Open and Close the Drawer
The first layer of JavaScript handles the drawer UI itself.
const cartDrawer = document.querySelector('#CartDrawer');


function openCartDrawer() {
    if (!cartDrawer) return;

    cartDrawer.classList.add('is-open');
    cartDrawer.setAttribute('aria-hidden', 'false');
    document.body.classList.add('cart-drawer-open');
}

function closeCartDrawer() {
    if (!cartDrawer) return;

    cartDrawer.classList.remove('is-open');
    cartDrawer.setAttribute('aria-hidden', 'true');
    document.body.classList.remove('cart-drawer-open');
}

document.addEventListener('click', function (event) {

    const openButton = event.target.closest('[data-cart-open]');
    const closeButton = event.target.closest('[data-cart-close]');

    if (openButton) {
        openCartDrawer();
    }

    if (closeButton) {
        closeCartDrawer();
    }

});
For accessibility, you should also support keyboard interaction, including closing the drawer with the Escape key and managing focus appropriately.
Step 8: Add Products to the Cart With Shopify Ajax
When a product is added from the product page, collection page, or quick-add component, you can use Shopify's Ajax Cart API to add the variant without a full page reload.
Shopify's Ajax API is designed for Shopify-hosted themes and supports cart operations without requiring a full page refresh. Shopify also recommends using the locale-aware window.Shopify.routes.root when constructing Ajax URLs.
Step 9: Update the Cart Quantity
When the customer clicks the plus or minus button, send the new quantity to Shopify rather than only changing the number displayed in the browser.
If the quantity becomes zero, Shopify removes the line item.
After the request completes, the drawer should be re-rendered or updated using the returned cart data and/or server-rendered section HTML.
Step 10: Remove Items From the Cart
A remove button can simply update the selected line to quantity zero.
async function removeCartLine(line) {


return updateCartLine(line, 0);
}
Using one update function for quantity changes and removals keeps the JavaScript simpler and reduces duplicated logic.
Step 11: Re-Render the Cart Drawer After Ajax Updates
This is where many custom cart drawer implementations become unnecessarily complicated.
You could manually update every product title, image, price, quantity, subtotal, discount, free shipping message, and item count using JavaScript. But that creates a second rendering system that has to stay synchronized with Shopify.
A cleaner approach is to let Liquid render the updated HTML and use the Section Rendering API to replace the relevant section.
Shopify specifically supports bundled section rendering with cart operations, allowing multiple theme sections to be updated as part of a cart request.
async function refreshCartDrawer() {


const response = await fetch(
    window.location.pathname + '?sections=cart-drawer'
);

const sections = await response.json();

const html = sections['cart-drawer'];

if (!html) return;

const existingSection =
    document.querySelector('#shopify-section-cart-drawer');

if (!existingSection) return;

existingSection.outerHTML = html;
}
This pattern allows Shopify Liquid to remain responsible for rendering the cart state while JavaScript handles the request and DOM replacement.
Shopify's performance guidance recommends using server-rendered Liquid and Section Rendering API updates instead of rebuilding Liquid-backed content entirely through JavaScript.
An Even Better Approach: Bundled Section Rendering
If your header contains a cart icon bubble and the drawer is a separate section, updating only the drawer may leave the header count outdated.
You can request multiple sections during a cart operation.
The server can then return updated HTML for the requested sections. This can keep the cart drawer and cart counter synchronized after an add-to-cart operation. Shopify documents this pattern as bundled section rendering with the Cart API.
Step 12: Dynamically Update the Free Shipping Bar
Because the free shipping progress is rendered using the actual Liquid cart total, it should automatically update whenever the drawer section is refreshed.
Add {{ remaining | money }}
more to unlock free shipping.
{% else %}
🎉 Free shipping unlocked!
{% endif %}
This is preferable to maintaining a separate JavaScript-only shipping calculation because the message remains tied to the server-rendered cart state.
Step 13: Add a Smart Free Shipping Message
Instead of showing the same generic message all the time, use different states based on cart value.
Cart State
Suggested Message
Empty cart
Add products to unlock free shipping.
Far from threshold
Add $X more to unlock free shipping.
Close to threshold
You're almost there — only $X more.
Threshold reached
🎉 You've unlocked free shipping!
For a DTC brand, the message should feel helpful rather than aggressive. The purpose is to make the benefit obvious, not pressure the shopper into unnecessary purchases.
Step 14: Add Product Recommendations to the Cart Drawer
A cart drawer can also be used for carefully selected cross-sells.
Examples include:
Frequently bought together products
Low-cost products that help reach free shipping
Accessories related to the selected product
Bundles
Recently viewed products
Best-selling complementary products
However, recommendations should not make the drawer unnecessarily heavy. Shopify's performance guidance recommends deferring content in dialogs and drawers when possible, especially content that isn't immediately needed.
For example, you can initially render the cart itself and load recommendations only after the drawer is opened.
Step 15: Keep the Cart Drawer Lightweight
A cart drawer is an interactive component, so performance matters. Loading large recommendation carousels, reviews, badges, videos, analytics scripts, and multiple third-party widgets inside the drawer can make the experience unnecessarily expensive.
A better architecture is:
Load the basic cart shell.
Render the essential cart information.
Open the drawer quickly.
Load secondary recommendations only when necessary.
Use server-rendered HTML for Liquid-backed updates.
Avoid creating large hidden DOM trees before the drawer is opened.
Shopify's current theme performance guidance specifically recommends deferring hidden drawer content and reducing unnecessary DOM nodes for components that are initially closed.
If your store already has performance problems, our guide on Shopify apps and third-party performance can help identify additional sources of frontend overhead.
Step 16: Add a Cart Drawer Loading State
Ajax operations can take a short amount of time. Without a loading state, shoppers may click the plus button multiple times and accidentally send multiple requests.
You don't necessarily need exactly this structure for every theme, but separating the drawer section, snippets, CSS, and JavaScript makes a custom Shopify theme easier to maintain.
A good implementation should follow a predictable flow:
1. Customer clicks Add to Cart
↓
2. JavaScript sends variant ID to Shopify Ajax Cart API
↓
3. Shopify updates the cart
↓
4. Updated cart section HTML is returned
↓
5. Cart drawer HTML is replaced
↓
6. Free shipping progress recalculates
↓
7. Cart counter updates
↓
8. Drawer opens
This architecture avoids treating the browser as the source of truth. Shopify remains responsible for the actual cart state.
Common Mistakes When Building a Shopify Cart Drawer
1. Updating Only the Frontend Quantity
Changing a number from 1 to 2 with JavaScript does not actually change the Shopify cart. Always send the change to Shopify's cart endpoint.
2. Calculating Prices Only With JavaScript
Discounts, line-item pricing, selling plans, taxes, and other cart behavior can make manual price calculations unreliable. Let Shopify return the authoritative cart state.
3. Reloading the Entire Page After Every Change
A full page reload works, but it defeats one of the main benefits of a cart drawer. Use the Ajax API and Section Rendering API where appropriate.
4. Loading Too Much Content Inside the Drawer
Reviews, videos, recommendation widgets, tracking scripts, and other third-party components can increase the drawer's DOM and JavaScript cost.
5. Ignoring Mobile UX
A drawer that looks perfect on desktop can become difficult to use on a 360px-wide mobile screen. Test touch targets, scrolling, quantity controls, and checkout visibility carefully.
6. Hard-Coding the Free Shipping Threshold
Hard-coded business rules become difficult to maintain. Give the merchant a theme setting whenever possible.
7. Rendering a Huge Hidden Drawer on Every Page
A closed drawer still contributes to the DOM if all of its content is rendered immediately. For complex drawers, consider lazy or on-demand rendering of secondary content.
Shopify's performance documentation specifically recommends reducing unnecessary DOM creation for initially hidden components such as cart drawers.
Cart Drawer Performance Optimization
Because the cart drawer can be triggered from almost every page, its implementation should be lightweight.
Follow these performance principles:
Keep the drawer markup compact.
Do not load unnecessary JavaScript libraries.
Use optimized product images.
Lazy-load secondary images where appropriate.
Defer non-essential recommendations.
Use Section Rendering API for server-rendered updates.
Avoid unnecessary DOM nodes.
Cache or reuse repeated calculations.
Don't load third-party widgets until they are actually needed.
Shopify's theme performance guidance also recommends minimizing expensive Liquid work, limiting unnecessary array processing, and using Section Rendering API for dynamic updates.
Before deploying the drawer to a production Shopify store, test every important cart state.
Test
Expected Result
Add product
Drawer opens with correct item
Increase quantity
Shopify cart and UI update
Decrease quantity
Quantity and subtotal update
Remove product
Item disappears
Empty cart
Empty state appears
Below free shipping threshold
Remaining amount is correct
At free shipping threshold
Unlocked message appears
Discount applied
Cart total remains Shopify-controlled
Mobile device
Drawer is usable and scrollable
Keyboard
Controls and close behavior work
Testing With Discounts and Promotions
Do not test the drawer only with a basic product priced at a fixed amount.
Also test:
Discount codes
Automatic discounts
Multiple quantities
Different product variants
Products with compare-at prices
Products with selling plans if applicable
Products with line-item properties
Markets and multiple currencies
Products that require shipping
The cart object contains the actual cart totals and item information, so your Liquid rendering should rely on Shopify's cart state rather than attempting to reconstruct it from client-side values.
Free Shipping Bar and Conversion Rate Optimization
The free shipping bar is particularly effective when the threshold is close enough to be achievable.
For example, if a customer has $92 in the cart and the free shipping threshold is $100, showing:
You're only $8 away from free shipping.
creates a clear merchandising opportunity.
A store could then recommend a $12 accessory, sample, or complementary product. This makes the cart drawer more than a confirmation component — it becomes part of the store's merchandising strategy.
However, avoid recommending irrelevant products just to increase average order value. The best cart drawer upsells are relevant, easy to understand, and genuinely useful to the customer.
Should You Use an App or Build the Cart Drawer Yourself?
There is no universal answer. The right choice depends on the store.
Requirement
Custom Development
App
Custom design
Excellent
Depends on app
Theme integration
Excellent
Varies
Advanced upsells
Customizable
Often built-in
Recurring app cost
Usually no
Often yes
Development time
Higher
Lower initially
Performance control
High
Depends on implementation
If the requirement is highly specific — for example, a branded cart drawer with a custom free shipping algorithm, custom upsells, subscription messaging, and a specific mobile UX — custom Shopify theme development can provide much greater control.
The default theme drawer cannot meet the design requirements.
The store needs a custom free shipping experience.
The business has complex upselling requirements.
The cart needs custom messaging.
The team wants full control over frontend performance.
The store needs custom integration with existing theme components.
The checkout journey is a major conversion priority.
Advanced Cart Drawer Ideas
Once the basic drawer works correctly, you can extend it with features such as:
Free shipping progress
Free gift progress
Tiered rewards
Buy-more-save-more messaging
Product bundles
Frequently bought together products
Gift wrapping
Cart notes
Delivery instructions
Subscription messaging
Estimated delivery messaging
Discount summaries
Recently viewed products
Personalized recommendations
However, every additional feature increases the complexity of the cart experience. Add functionality based on a clear business requirement rather than turning the cart drawer into an overloaded mini storefront.
How to Keep the Cart Drawer Maintainable
A cart drawer can become difficult to maintain when Liquid, JavaScript, CSS, and app code are all mixed together.
Follow these principles:
Keep cart rendering in Liquid.
Keep interaction logic in JavaScript.
Keep visual styling in CSS.
Use snippets for repeated cart components.
Use section settings for merchant-controlled values.
Use data attributes for JavaScript hooks.
Keep Ajax requests centralized.
Use server-rendered sections when the UI depends on Liquid data.
Test cart behavior after theme updates.
This follows the broader principle of keeping Shopify theme architecture modular. If your current theme has accumulated large amounts of custom code, our guide on how to customize a Shopify theme safely is a useful next step.
Custom Shopify Cart Drawer Checklist
Before launching your custom cart drawer, make sure you have checked everything below:
Cart drawer opens correctly.
Overlay closes the drawer.
Close button works.
Escape key works.
Cart items render correctly.
Variant information displays correctly.
Quantity controls update Shopify's cart.
Remove buttons work.
Subtotal updates correctly.
Discounts remain accurate.
Free shipping progress updates.
Free shipping threshold is configurable.
Empty cart state works.
Checkout CTA works.
Cart icon count updates.
Mobile layout works.
Keyboard navigation works.
Screen reader labels are present.
Loading states prevent duplicate requests.
Ajax errors are handled.
Images are optimized.
Third-party scripts are minimized.
Drawer content does not create unnecessary DOM overhead.
Theme editor behavior has been tested.
Discounts and promotions have been tested.
Final Thoughts
Building a custom slide-out cart drawer in Shopify Liquid is more than creating a panel that appears from the side of the screen. A production-quality implementation needs to combine Shopify Liquid, the Ajax Cart API, Section Rendering API, JavaScript, CSS, accessibility, responsive design, and performance best practices.
The most important architectural principle is simple: Shopify should remain the source of truth for the cart. JavaScript should handle interactions and requests, while Liquid and Shopify's server-rendered sections can handle the actual cart presentation.
A free shipping progress bar can then sit on top of this architecture and turn the cart into a useful conversion and merchandising component. When implemented correctly, it gives customers a clear reason to continue shopping while keeping the checkout path visible.
If your Shopify store needs a completely custom cart drawer, optimized theme architecture, custom Liquid sections, or conversion-focused storefront development, explore our Shopify development services or view our Shopify development portfolio.